One of the most common questions I get is whether you'll need a handyman to install your shelves. If you can use a drill, a stud finder, and a level, you can do this yourself. Every hardwood floating shelf I build ships with the Hovr bracket system, all the mounting hardware, and the drill bit you'll need. The whole install takes about 20 minutes per shelf once you've done it once.

Before you drill anything: check for electrical wires and plumbing behind the wall. A stud finder with AC detection will flag wires. If you're not sure what's behind the drywall, especially in kitchens and bathrooms near outlets or fixtures, it's worth taking the extra minute to check.
What You'll Need
Most of this ships with the shelf. The rest you probably already own.
Included with every shelf: Hovr male bracket, female bracket (pre-installed in the shelf), #8 2-1/2" panhead screws, 3/16" drill bit, set screws, #2 square drive bit, allen wrench.
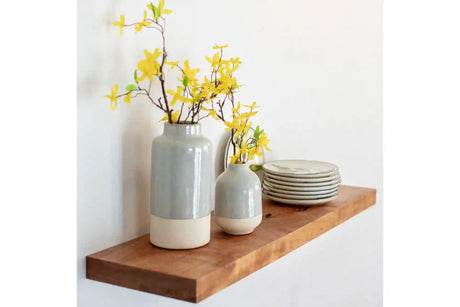
Every shelf ships as a complete floating shelf kit, with everything in the box ready to mount the day it arrives.
You'll need: a power drill, a stud finder, a level (a 24" torpedo level works fine), a pencil, and a tape measure.
That's it. No special tools, no anchors, no trip to the hardware store.
Step-by-Step: The Hovr Bracket Install
Step 1: Plan Your Shelf Location
Hold the male bracket against the wall where you want the shelf. Mark the top and sides with a pencil. This is your shelf location outline.
If you're installing multiple shelves on the same wall, plan the full layout before drilling anything. Mark all shelf positions with painter's tape first, step back, and make sure the spacing and placement look right. Moving tape is a lot easier than patching drywall.
If you haven't finalized your shelf dimensions yet, the guide on choosing the right depth covers recommendations by room.
Step 2: Find and Mark Your Studs
Run the stud finder along your marked shelf location and mark each stud with a pencil. Studs are typically 16" apart. A 36" shelf hits two studs. A 48" shelf hits three. More studs means more weight capacity, since the Hovr bracket is rated for serious weight at 150 lbs per stud.
Transfer the stud marks onto the male bracket by holding it back up to the wall at your marked location and penciling the stud positions directly onto the bracket.
Step 3: Drill and Attach the Male Bracket
Using the included 3/16" drill bit, drill two holes at each stud location on the male bracket: one near the top guideline, one near the bottom, vertically aligned and centered on the guidelines printed on the bracket.
Attach the male bracket to the wall using the included #8 2-1/2" panhead screws and the #2 square drive bit.
Important: snug, not gorilla-tight. Over-tightening the screws can press the flat back of the bracket into the drywall, which prevents the female bracket from engaging properly later. You want the bracket firm against the wall, not buried in it.
Step 4: Engage the Shelf
This is the satisfying part. Tilt the shelf downward at about a 15-degree angle to line up the female bracket (already installed in the back of the shelf) with the male bracket on the wall. Hook the upper part of the female bracket onto the upper part of the male bracket and pull the shelf down into position.
If the brackets don't fully click together, give the back of the shelf (close to the wall) two or three solid taps from above. This knocks the two pieces into alignment and locks them together. Don't be gentle about it. A firm tap is what the bracket is designed for.
Step 5: Secure the Set Screws
Flip to the underside of the shelf and you'll see pre-drilled holes. Insert the set screws and tighten with the included allen wrench. These lock the male and female brackets together so the shelf can't be bumped off.
Don't skip this step. The set screws are what turn "sitting on the bracket" into "locked to the bracket." They take 30 seconds to install and they're the difference between a shelf that stays put and one that shifts when someone bumps it from below.
Step 6: Check Level and Enjoy
Set your level on the shelf. If it's slightly off, loosen the set screws, adjust, and re-tighten. Once it's level, you're done. Load it up.
Corner Installs
A corner setup uses two separate shelves, one on each wall, butted together in the corner. Install each shelf independently following the steps above. The Hovr bracket allows you to slide the shelf along the hardware, so you can push each shelf tight into the corner for a seamless joint. No mitering, no special hardware.

Tip: install the shorter wall's shelf first, then slide the longer shelf into it. This gives you more room to work.
Longer Shelves: More Studs, Same Process
For longer shelves at 48" to 72", the process is identical. You'll just hit more studs (three to four on a 48" shelf, four to five on a 72" shelf), which means more screws and more capacity. A 72" shelf on four studs holds 600 lbs. The bracket doesn't care how long the shelf is; the install is the same per stud.

Dealing With Uneven Walls
Not all walls are flat. This is normal, especially in older homes. The Hovr bracket tolerates up to 1/4" of gap between the back of the bracket and the wall without compromising holding capacity. The 2-1/2" screws are still going 2" into the stud even with that gap, so the connection is solid.
If the gap is visible between the shelf and the wall after install, a bead of clear silicone along the back edge hides it completely. This is an old trick from countertop installers: once the silicone dries, it catches light in a way that makes the gap disappear. No need to reframe the wall.
If your wall has a significant bow and the bracket bends when you tighten it, loosen the screws slightly. The bracket needs to stay straight for the male and female components to engage. Over-tightening into a bowed wall curves the bracket and prevents the shelf from locking on. Hovr has detailed uneven wall solutions with diagrams if you're dealing with a particularly challenging wall.
Troubleshooting: The Shelf Wiggles
A slight wobble after install is normal. Wood and drywall both have a small amount of give, and that's inherent in the materials. It doesn't mean the install is wrong or unsafe.
If the wobble is more than slight, the most common causes in order of likelihood:
The female bracket is seated too deep in the shelf channel. It should protrude about 1/64" from the back of the shelf at the bottom, just enough to press slightly into the drywall and prevent forward lean.
The male bracket was over-tightened, embedding the flat back into the drywall and preventing proper engagement with the female bracket. Loosen the screws a turn or two.
The set screws weren't installed. This is more common than you'd think. Go back to Step 5.
The shelf wasn't given a firm tap after hanging. The brackets need to be knocked into full engagement. Give it a solid hit at the back.
For a full walkthrough of every troubleshooting scenario with diagrams, Hovr's troubleshooting guide covers it all.
A Note on Pine Shelves
If you ordered pine floating shelves, those use a different bracket system (white oak dowel rods instead of the Hovr aluminum bracket) and ship with their own installation instructions. The process is similar in concept but the hardware and steps are different. Follow the instructions included with the pine shelf rather than the Hovr steps above.
After the Install
Once the shelf is up and loaded, there's not much to do. The Shelf Expression Promise covers every shelf with a lifetime guarantee against warping and cracking, and the Hovr bracket doesn't sag over time. For keeping the wood surface looking good, the guide on caring for the finish covers dusting, cleaning, and refinishing if a scratch happens.
Pick Your Shelf, Then Pick Up the Drill

The install is the easy part. Choosing the species and size takes longer than putting the shelf on the wall. Whether it's walnut in the living room, live edge in the dining room, or custom floating shelves cut to fit an awkward niche, every shelf ships ready to mount with everything you need in the box.
Browse the full solid wood floating shelves collection, order your shelves, and budget 20 minutes per shelf for the install. You won't need the handyman. For the full weight capacity breakdown, that post covers exactly how much each setup can hold.